
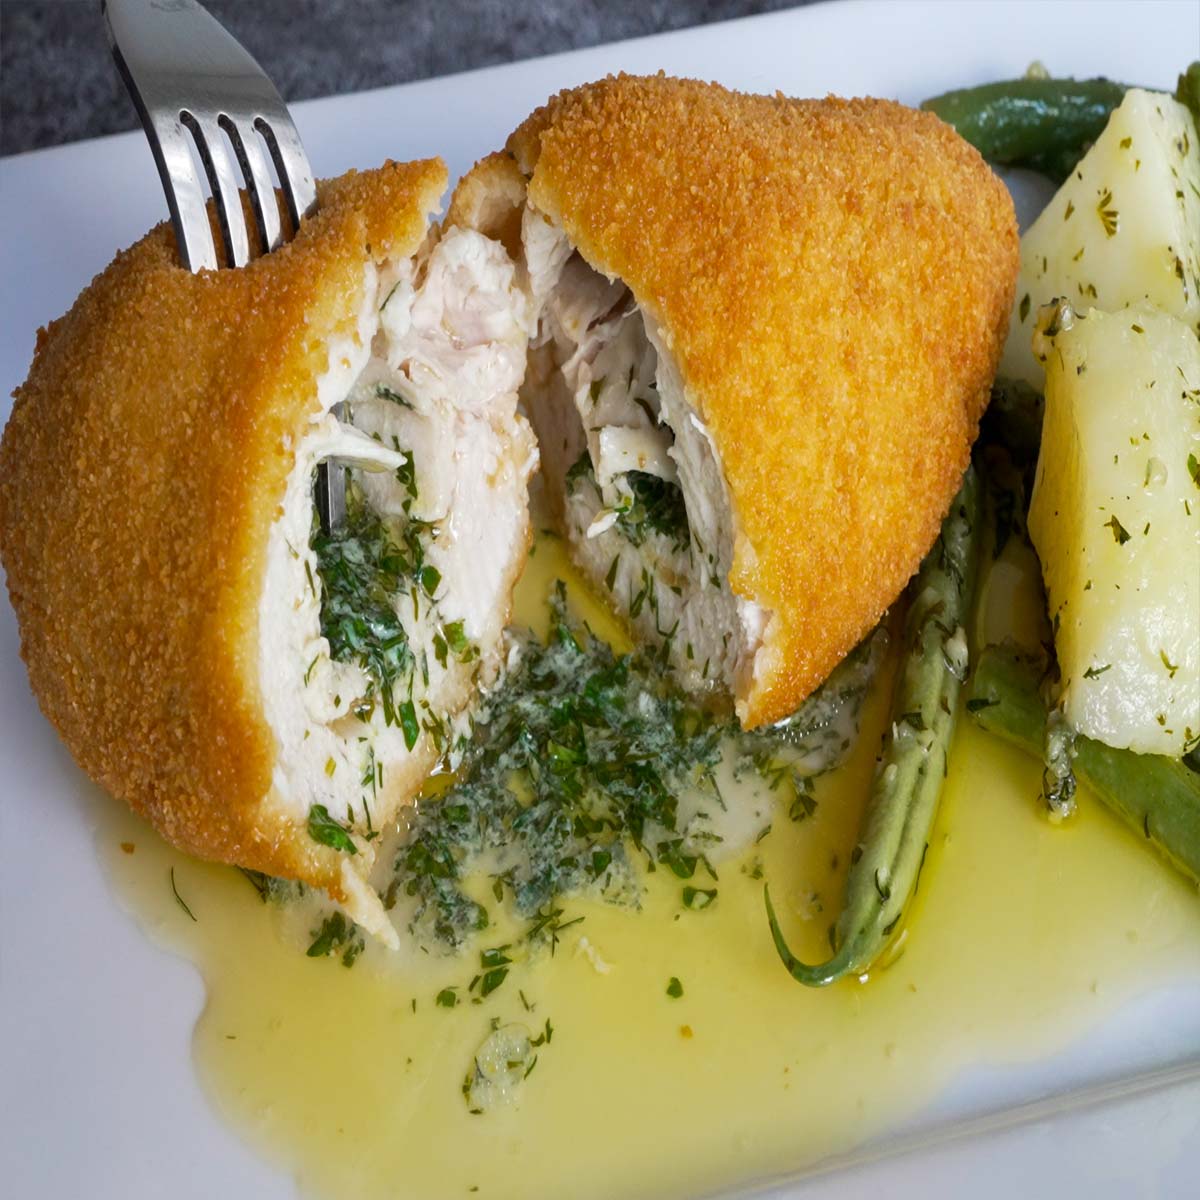
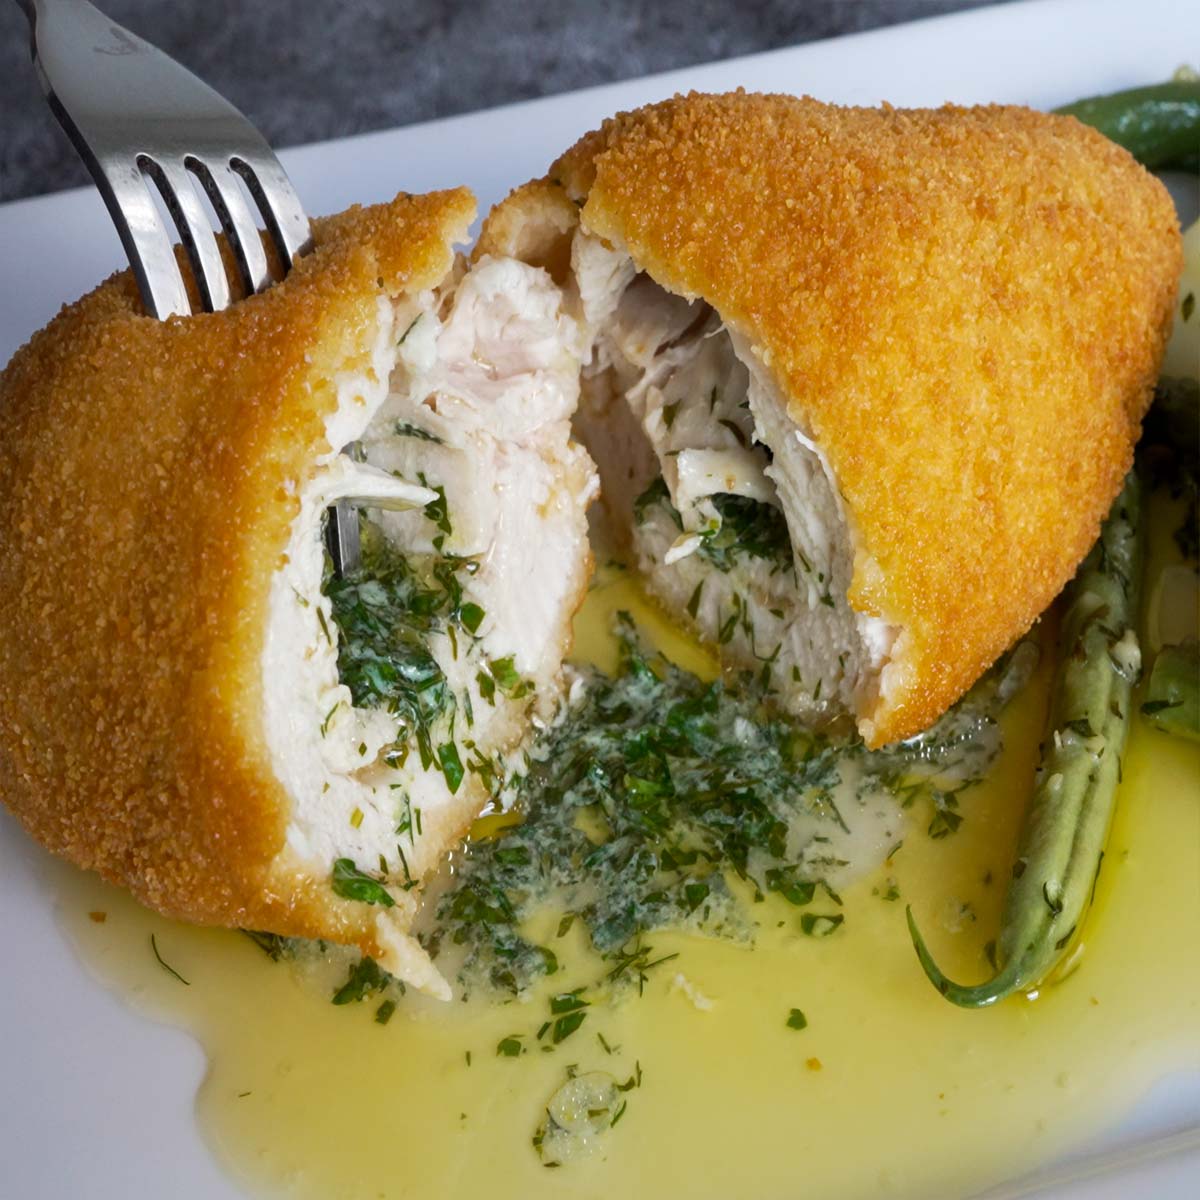
Chicken Kiev is a tasty dish made with chicken breast flattened and wrapped around a delicious aromatic filling.
You will also like Lemon Pepper Chicken, Chicken Pot Pie, Honey Garlic Chicken, Chicken Croquettes, Chicken Sandwich and Chicken Alfredo Pasta.
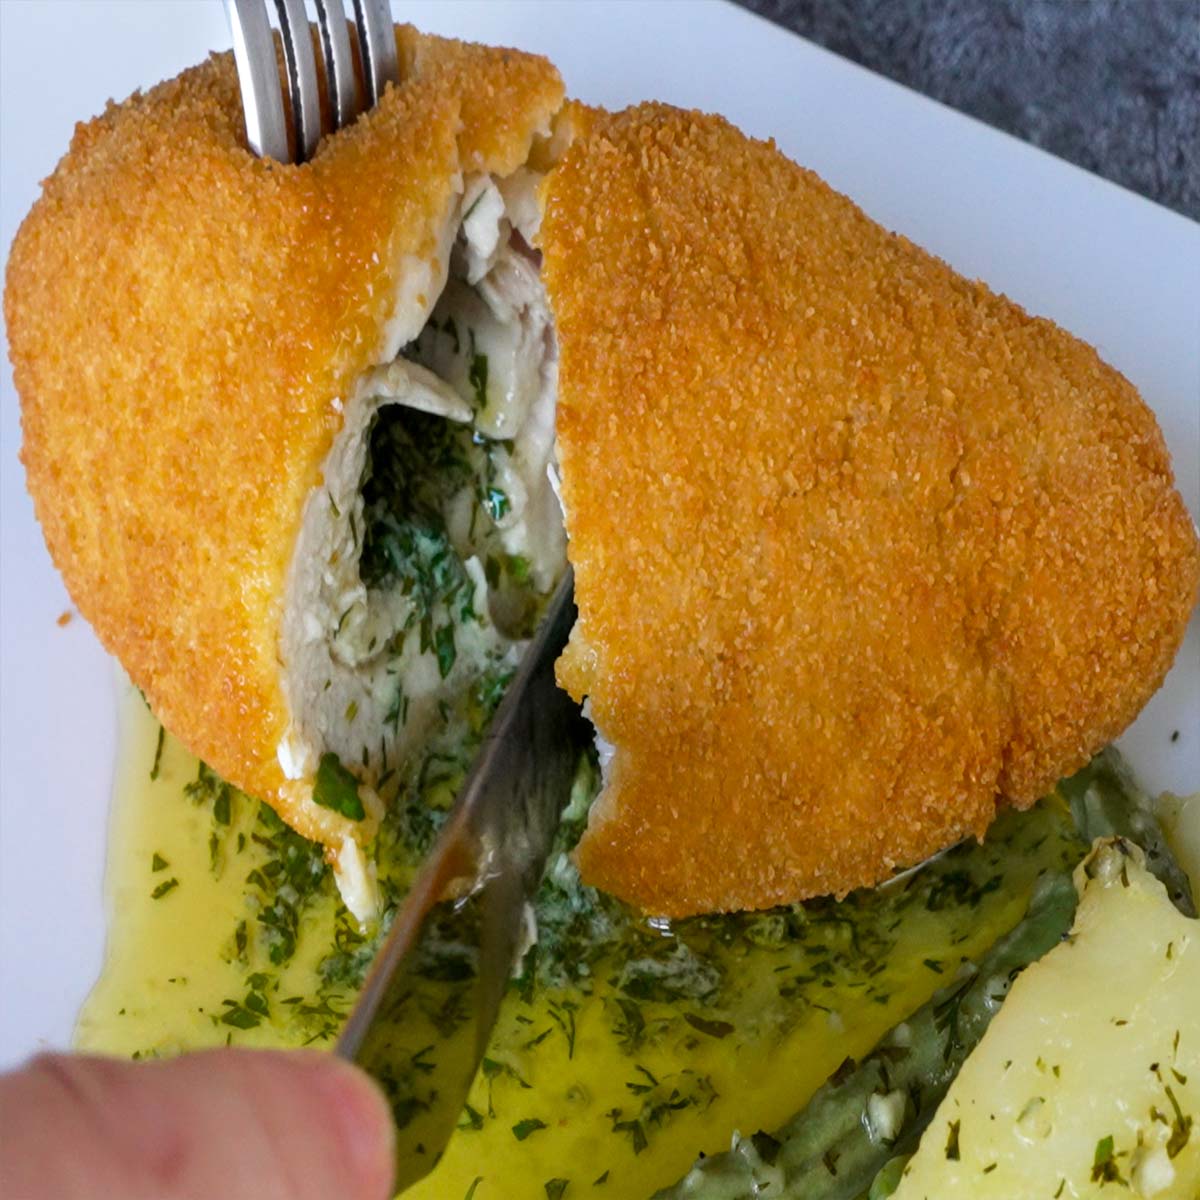
The filling usually has butter mixed with garlic and herbs, which gives a nice surprise when you cut into the crispy, golden crust. It's an easy and yummy meal that everyone will enjoy!
Jump to:
⭐Why You'll Love This Chicken Kiev Recipe
Here are a few reasons to fall in love with this recipe:
- Homemade Goodness: Making Chicken Kiev from scratch allows you to control the quality of ingredients, ensuring a delicious dish.
- Perfectly Cooked Chicken: The combination of pan-searing and oven baking ensures that the chicken is cooked to perfection, juicy on the inside and crispy on the outside.
- Rich and Flavorful Butter Mixture: The combination of fresh dill, parsley, garlic, lemon zest, and juice in the butter mixture adds a burst of fresh and aromatic flavors to the chicken.
- Crispy and Golden Brown Coating: The breading process, along with the chilling step, ensures a perfectly crispy and golden brown exterior while keeping the chicken moist on the inside.
- Surprise Burst of Flavor: The hidden pocket of herbed butter inside the chicken breast provides a delightful and flavorful surprise with every bite.
- Restaurant-Quality at Home: Impress your family and guests with a dish that looks and tastes like it came from a restaurant.
- Visual Appeal: The finished dish is visually appealing, making it suitable for both everyday meals and special occasions.
If you want more comfort food you should check out One Pan Chicken Mushroom and Chicken One-Pot Rice(Spanish Rice Recipe).
🧾Ingredients
Here is a list of everything you need.
For Butter Mixture:
- Dill: Adds a fresh, aromatic, and slightly tangy flavor to the butter mixture. Substitute with fresh tarragon or chives instead of dill.
- Butter: Provides richness and a smooth, creamy texture to the flavored butter. You can use margarine or a plant-based butter substitute.
- Parsley: Enhances the butter with a mild, herbal flavor, adding freshness to the dish.
- Lemon Zest: Contributes a bright and citrusy aroma to the butter.
- Lemon Juice: Adds acidity and a hint of citrus flavor, balancing the richness of the butter.
- Salt: Seasoning ingredient that enhances the overall taste of the butter mixture and the chicken.
- Black Pepper: Adds a gentle heat and depth to the butter mixture, complementing the other flavors.
- Garlic Cloves: Introduces a savory and aromatic quality, enhancing the overall flavor of the butter mixture.
Chicken:
- Chicken Breast: The main protein source; when properly cooked, it provides a juicy and tender texture. Substitute with boneless and skinless chicken thighs instead of chicken breast for a different texture and flavor.
- Salt: Seasoning that enhances the natural flavors of the chicken.
- Black Pepper: Adds a subtle heat and complements the overall seasoning of the chicken.
For Breading:
- Flour: Creates a base layer for the breading process, helping the eggs adhere to the chicken.
- Eggs: Acts as a binder for the breadcrumbs, allowing them to stick to the chicken and create a crispy exterior. For an egg-free option, try using a mixture of plant-based milk and cornstarch as a binder.
- Breadcrumbs: Forms a crunchy coating around the chicken, providing texture and a golden-brown finish when cooked. Panko breadcrumbs or crushed cornflakes can be used for a different texture instead of breadcrumbs.
Side Dish:
- Potatoes: A starchy element that, when boiled or roasted, serves as a hearty and filling side to the Chicken Kiev. Sweet potatoes, cauliflower, or parsnips can be used as alternatives to regular potatoes.
- Green Beans: Adds a fresh and crisp vegetable component to the side dish, providing balance to the meal. Asparagus, broccoli, or snap peas can replace green beans for variety.
- Salt: Seasoning for both the potatoes and green beans, enhancing their flavors.
- Black Pepper: Adds a mild heat and complements the overall seasoning of the side dish.
See the recipe card below for a full list of ingredients and measurements.
👩🏻🍳How to Make Chicken Kiev
These step-by-step instructions and photos will help you to visualize how to make this recipe. See the recipe card for a printable version of this recipe.
1. Combine softened butter with chopped dill, parsley, lemon zest, lemon juice, salt, minced garlic, and black pepper in a bowl, mixing thoroughly.
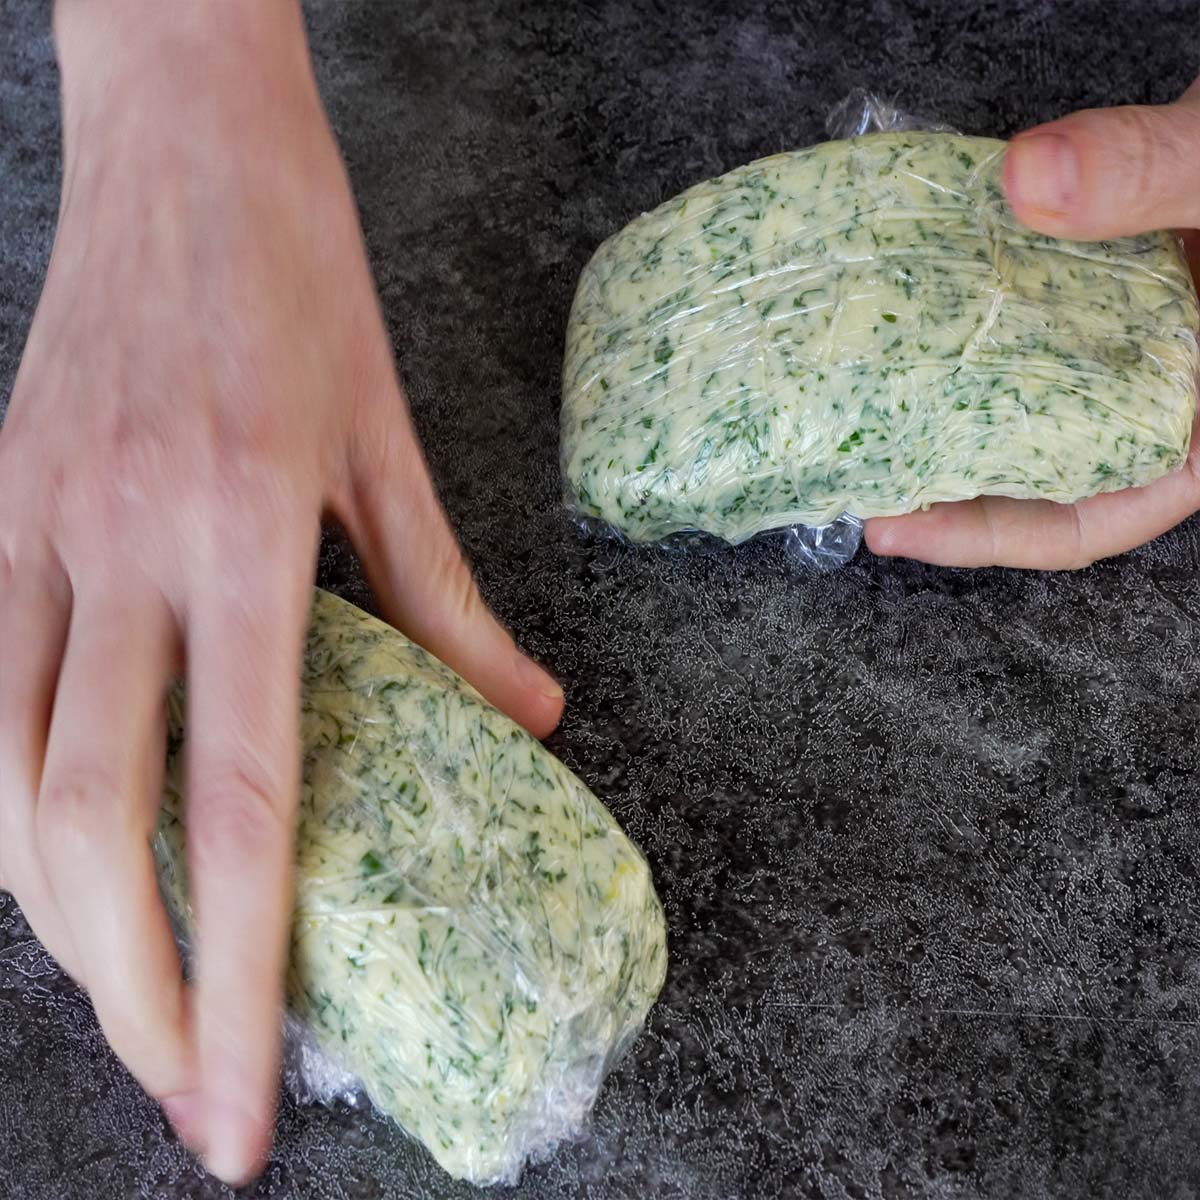
2. Spread butter mixture on plastic wrap, shape into a log, wrap tightly, and freeze for 15 mins.
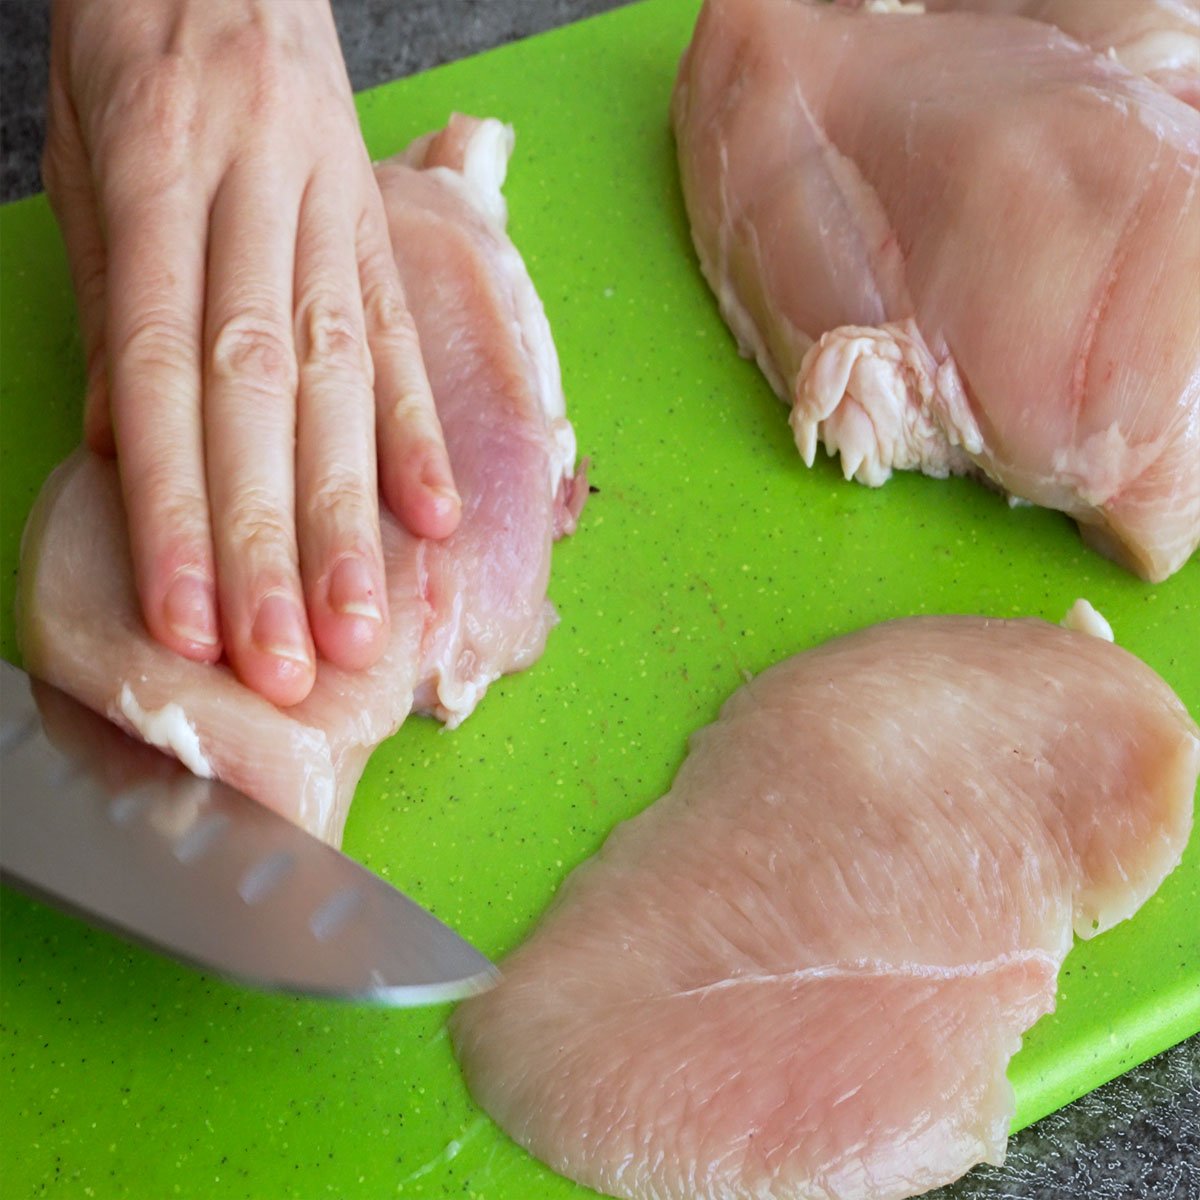
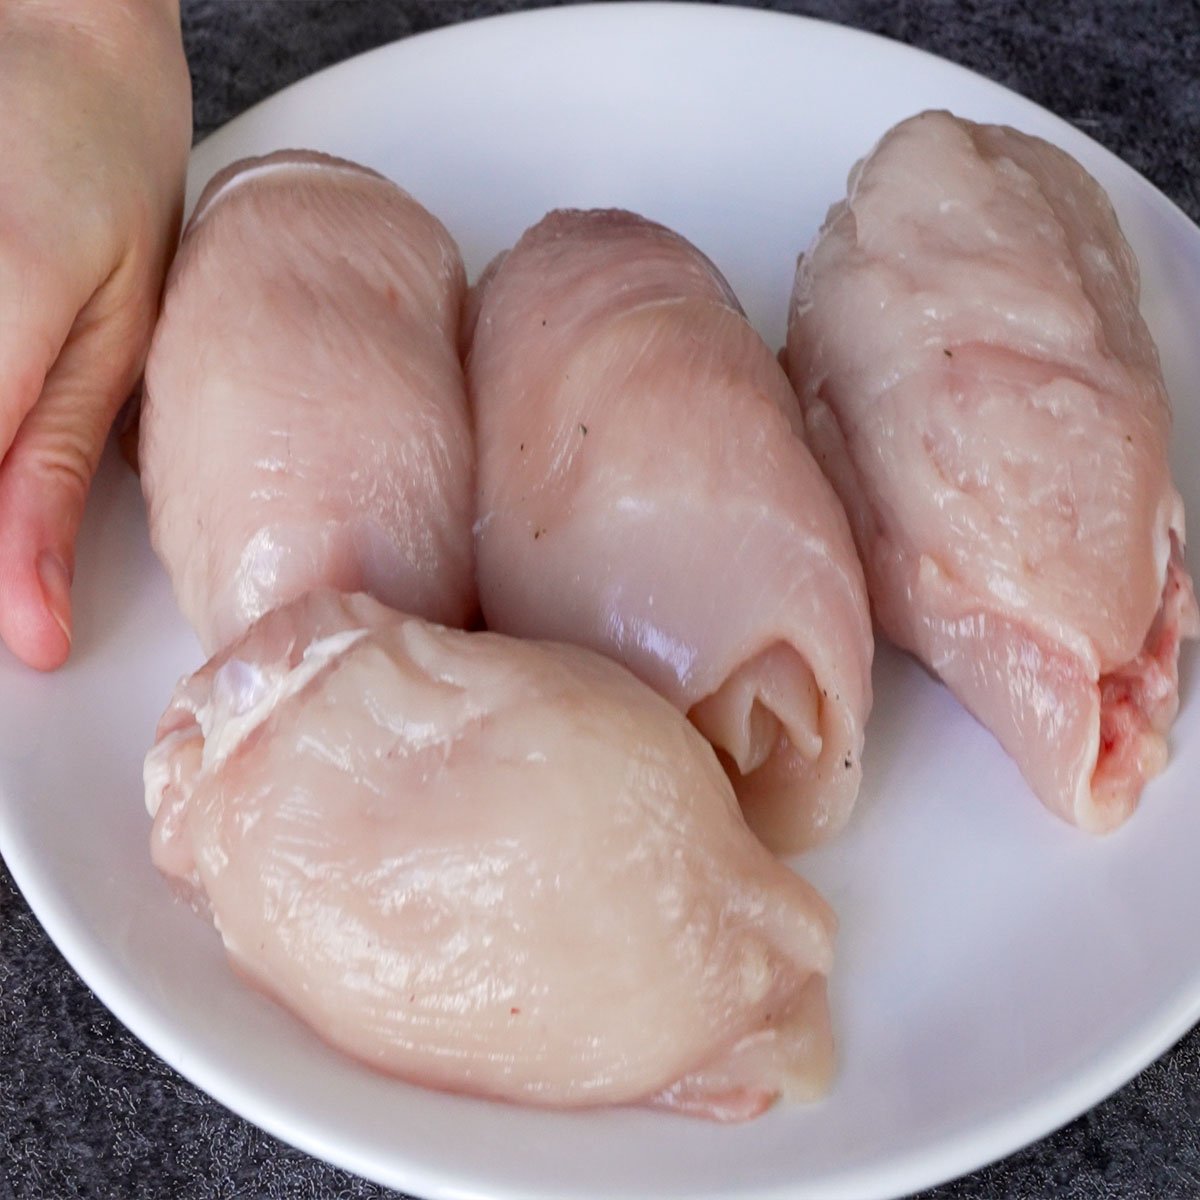
3. Slice each chicken breast on a cutting board with a sharp knife to divide the thicker fillet.
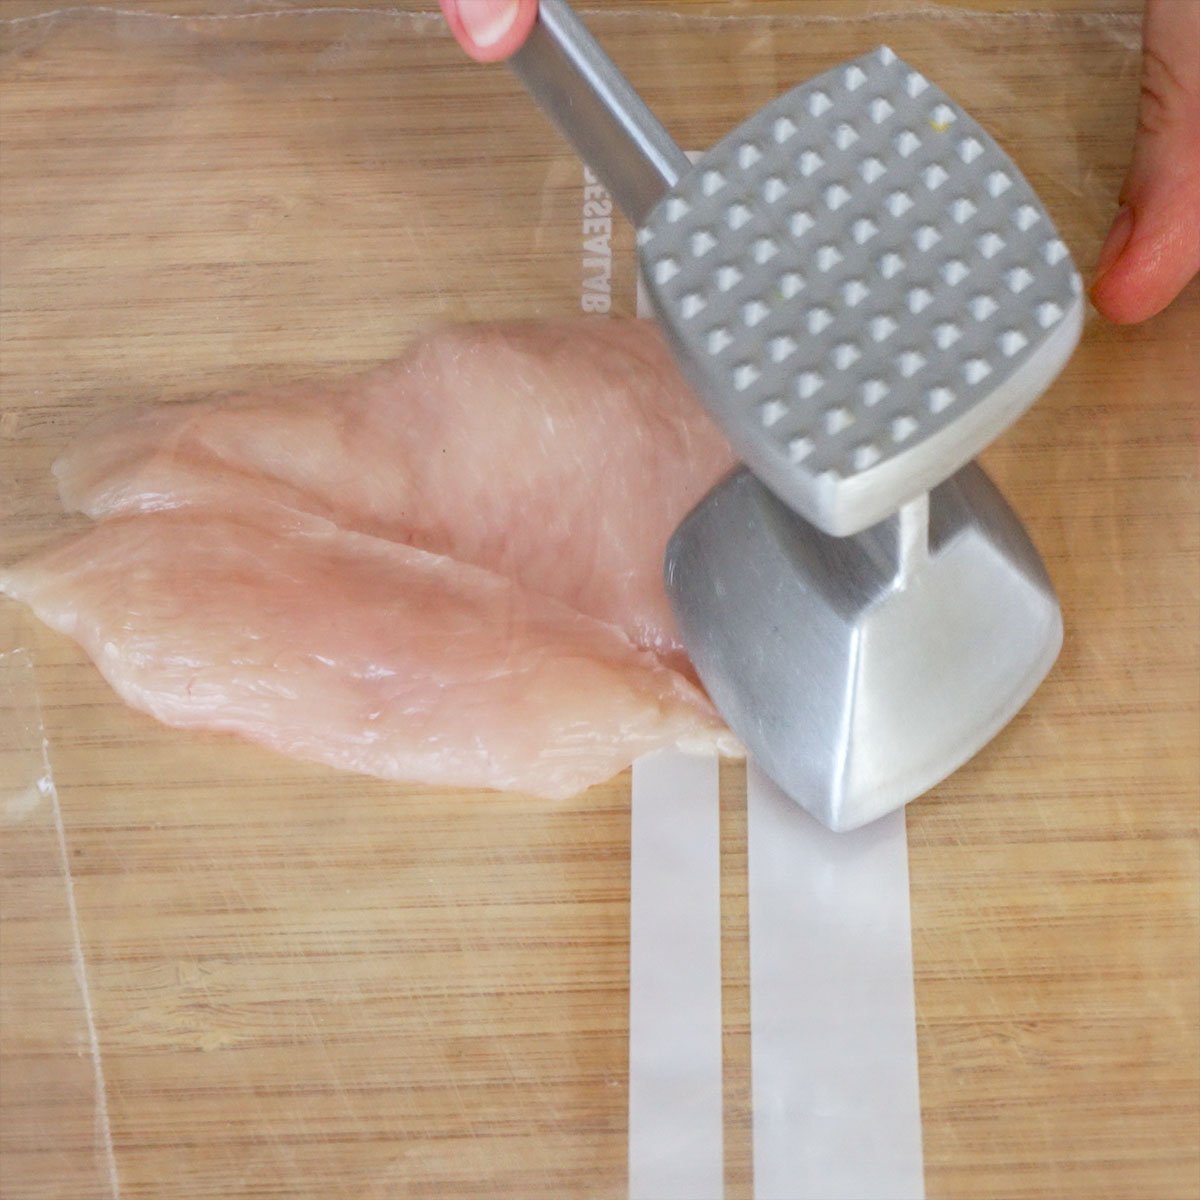
4. Sandwich each chicken breast fillet between cling film sheets and pound with a meat tenderizer until flattened.
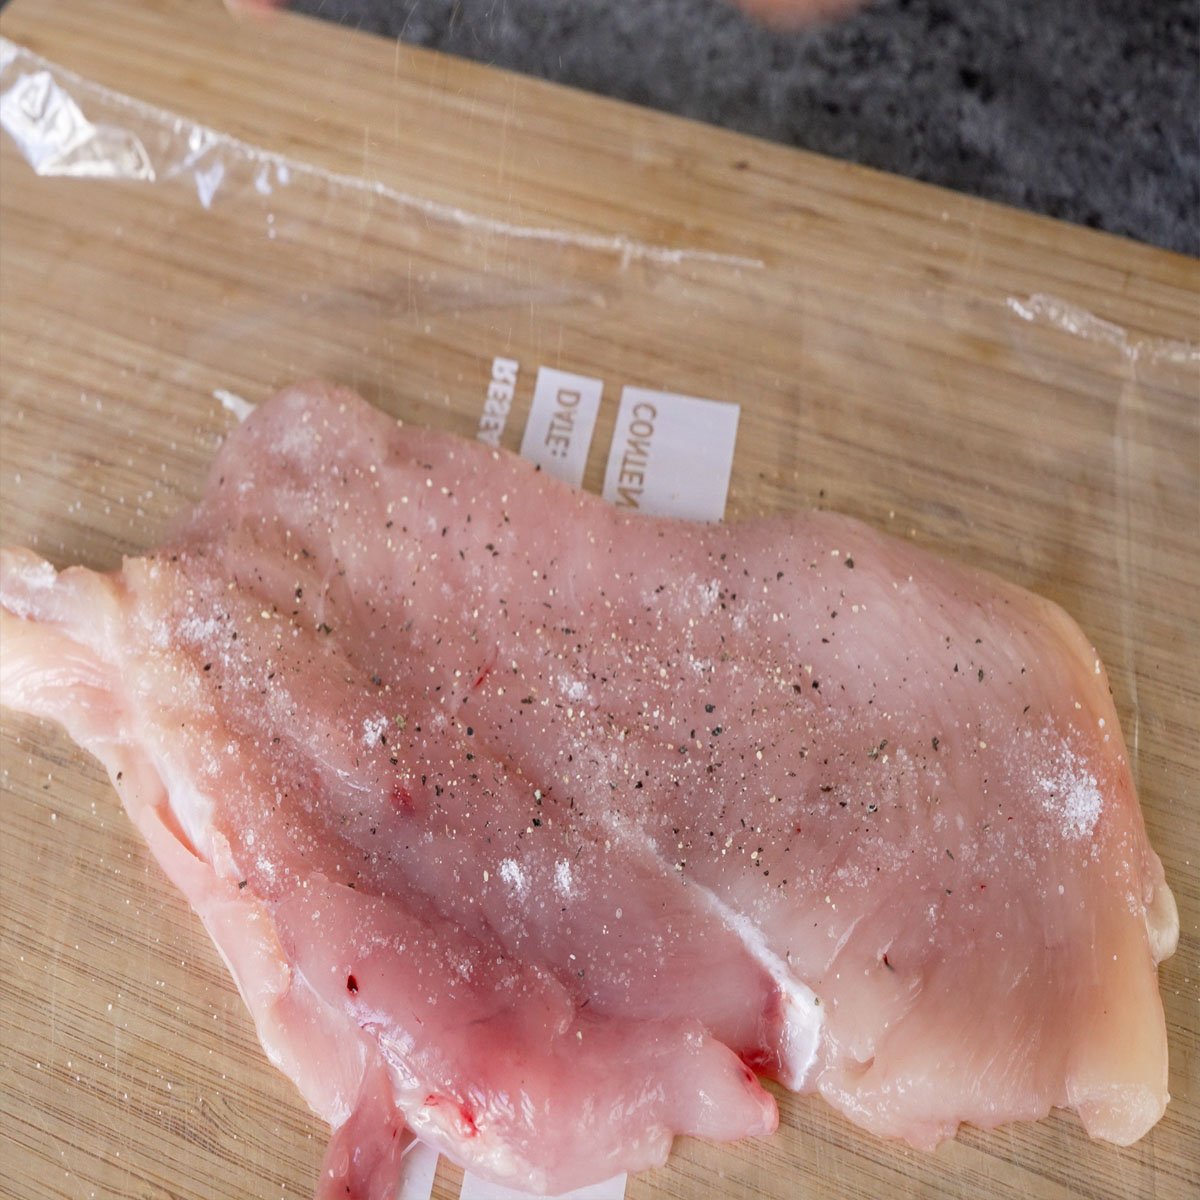
5. Season the chicken breast fillet with salt and pepper.
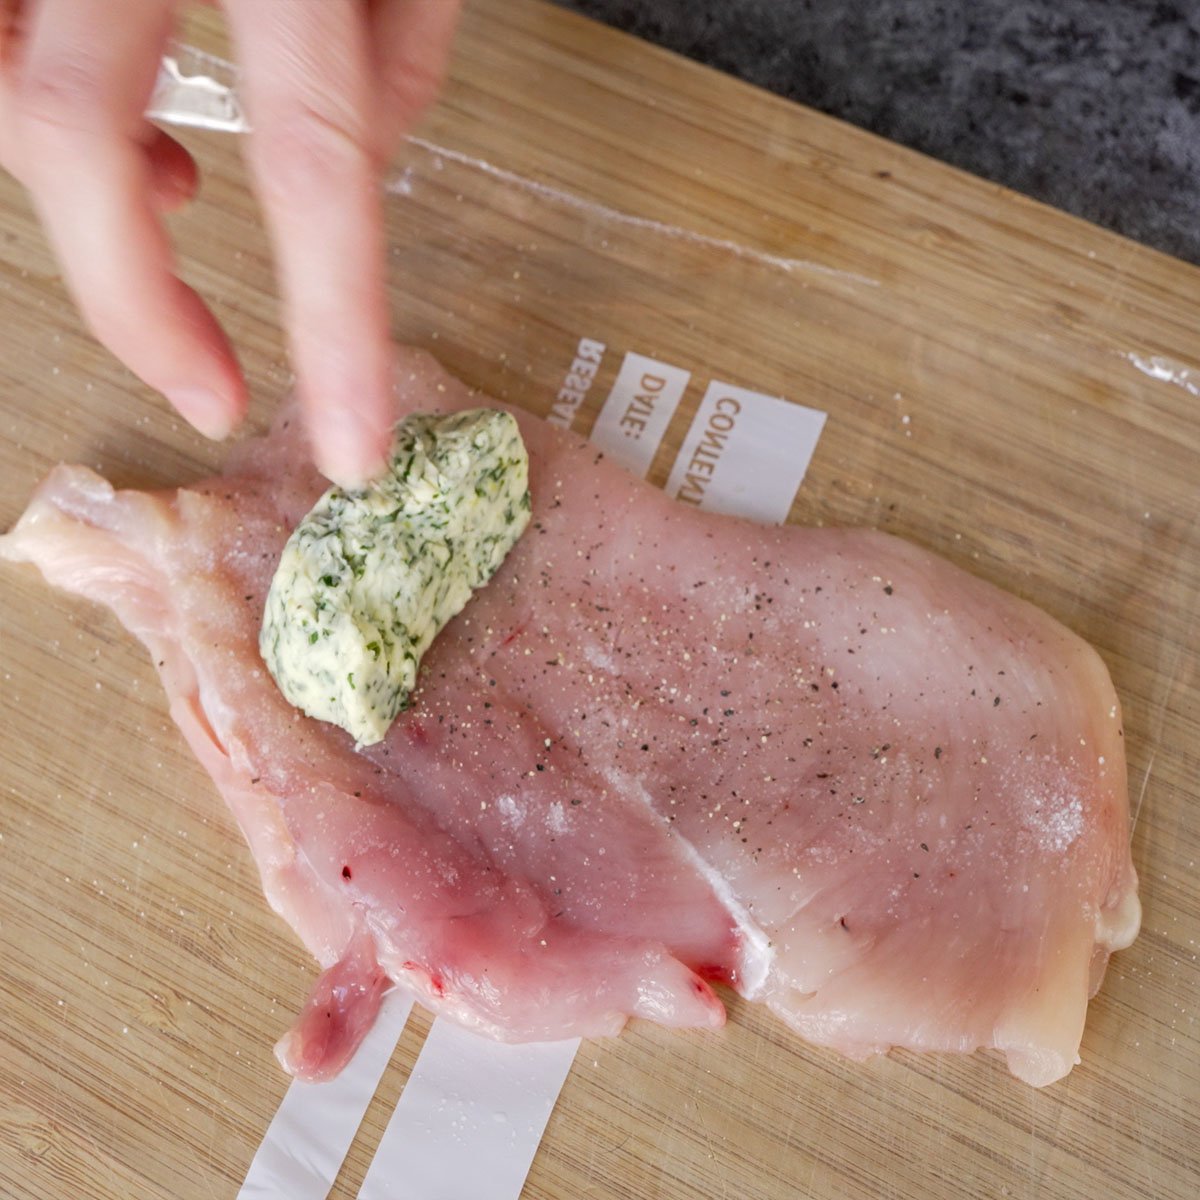
6. Cut frozen butter, place a piece on each chicken breast, and wrap the fillet around to enclose.
7. Freeze the stuffed chicken for 15 minutes.
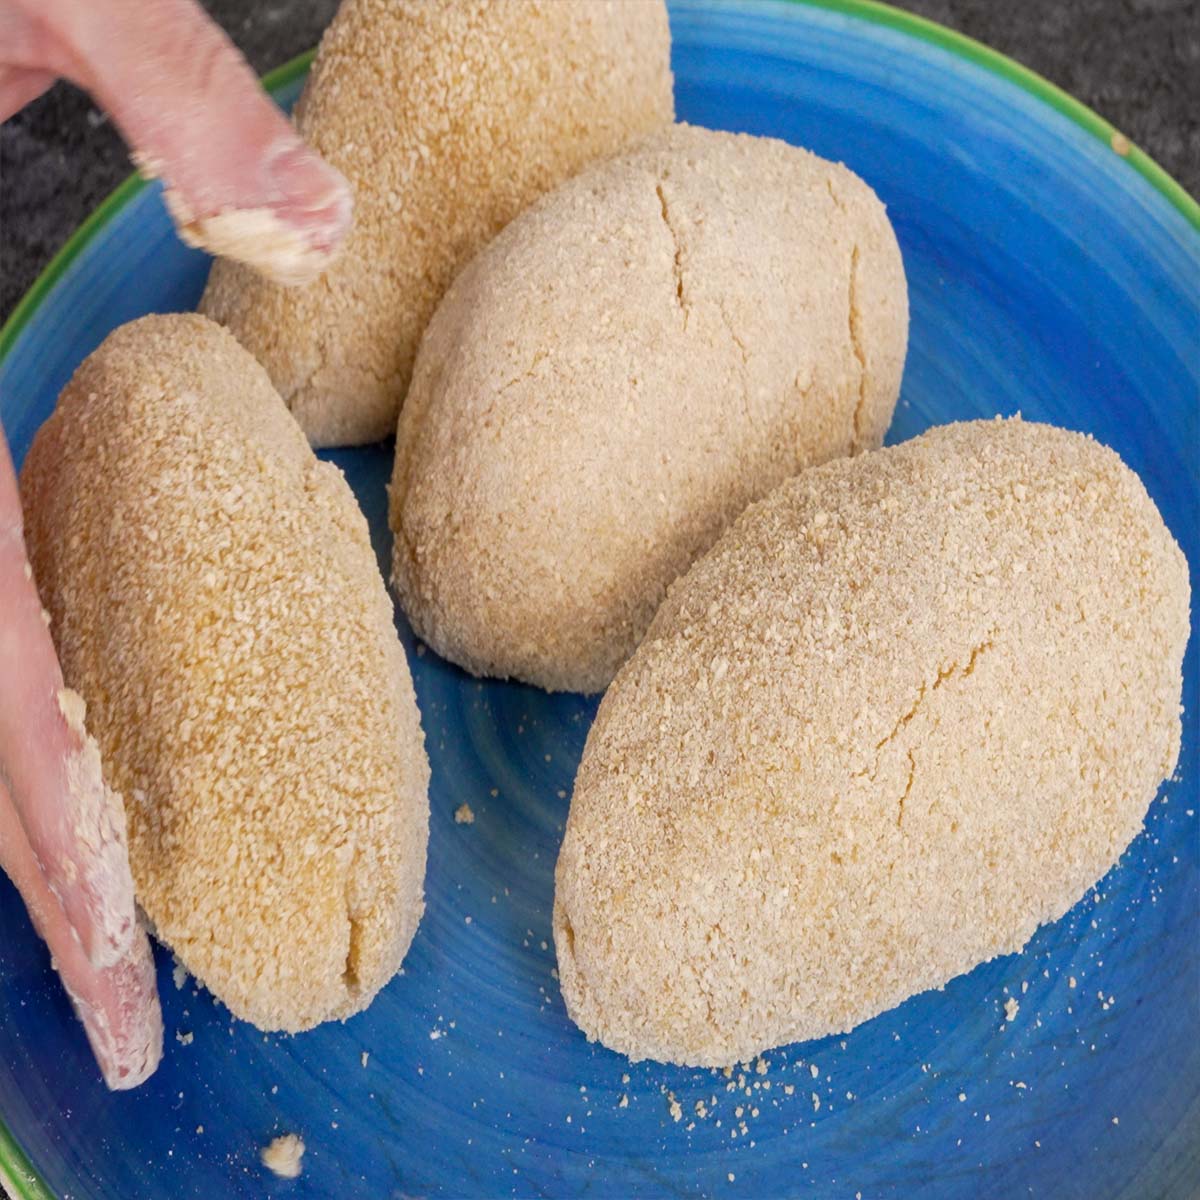
8. Coat stuffed chicken in flour, dip in eggs, and breadcrumbs, ensuring even coating, and remove excess.
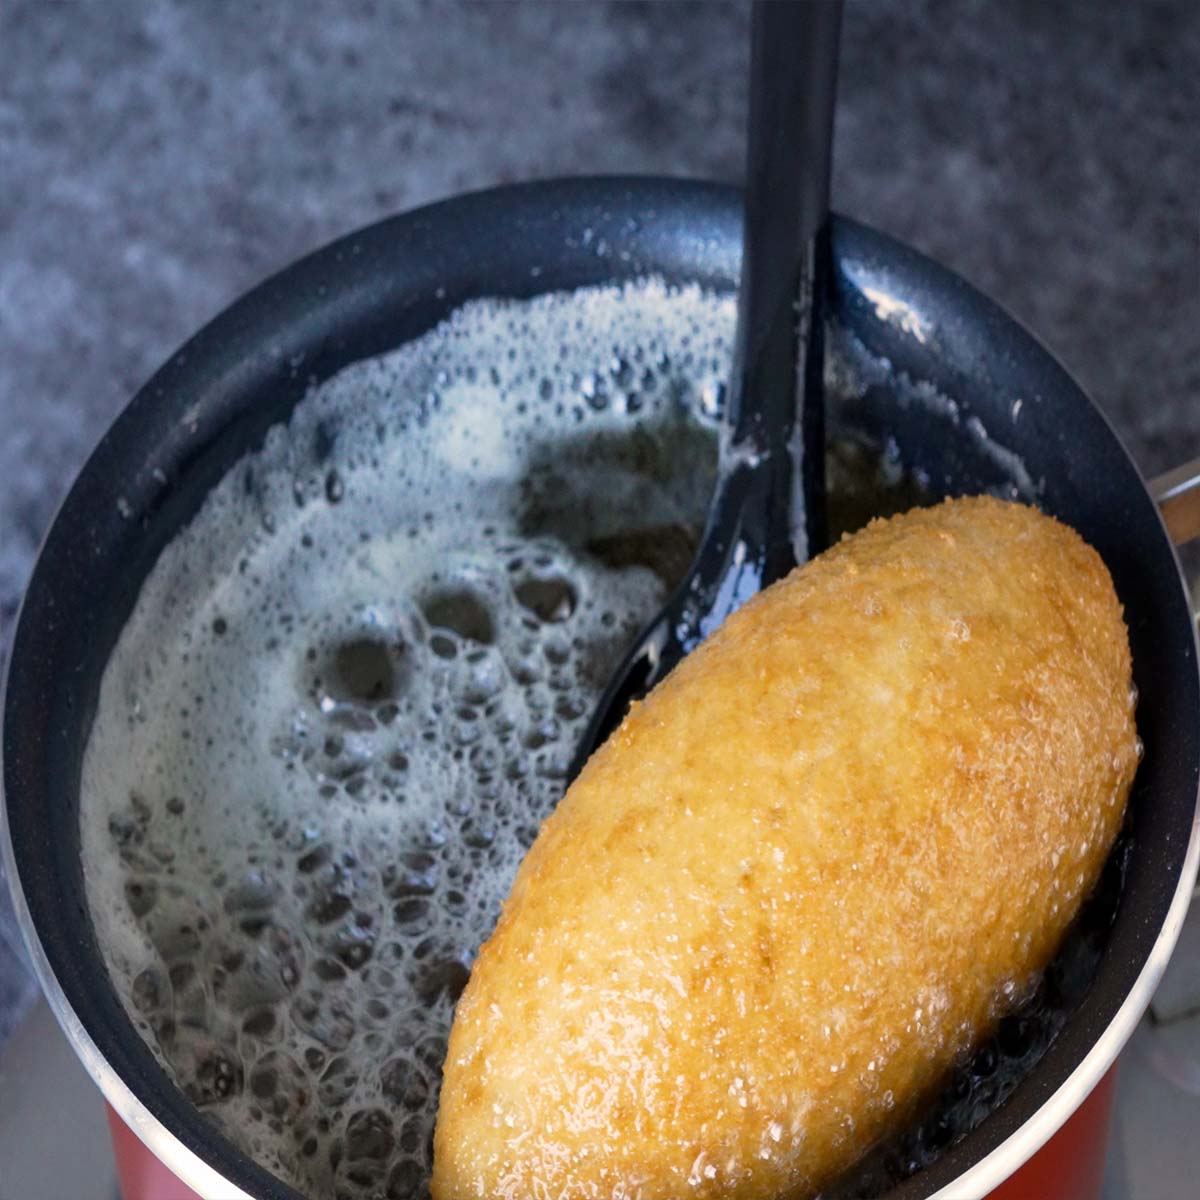
9. In a pan over medium heat, deep fry breaded chicken until golden brown on all sides.

10. Move the partially cooked chicken to oven at 180°C (356°F), bake for 20 minutes until golden brown and cooked through.

11. Boil potato chunks and green beans while the chicken bakes.
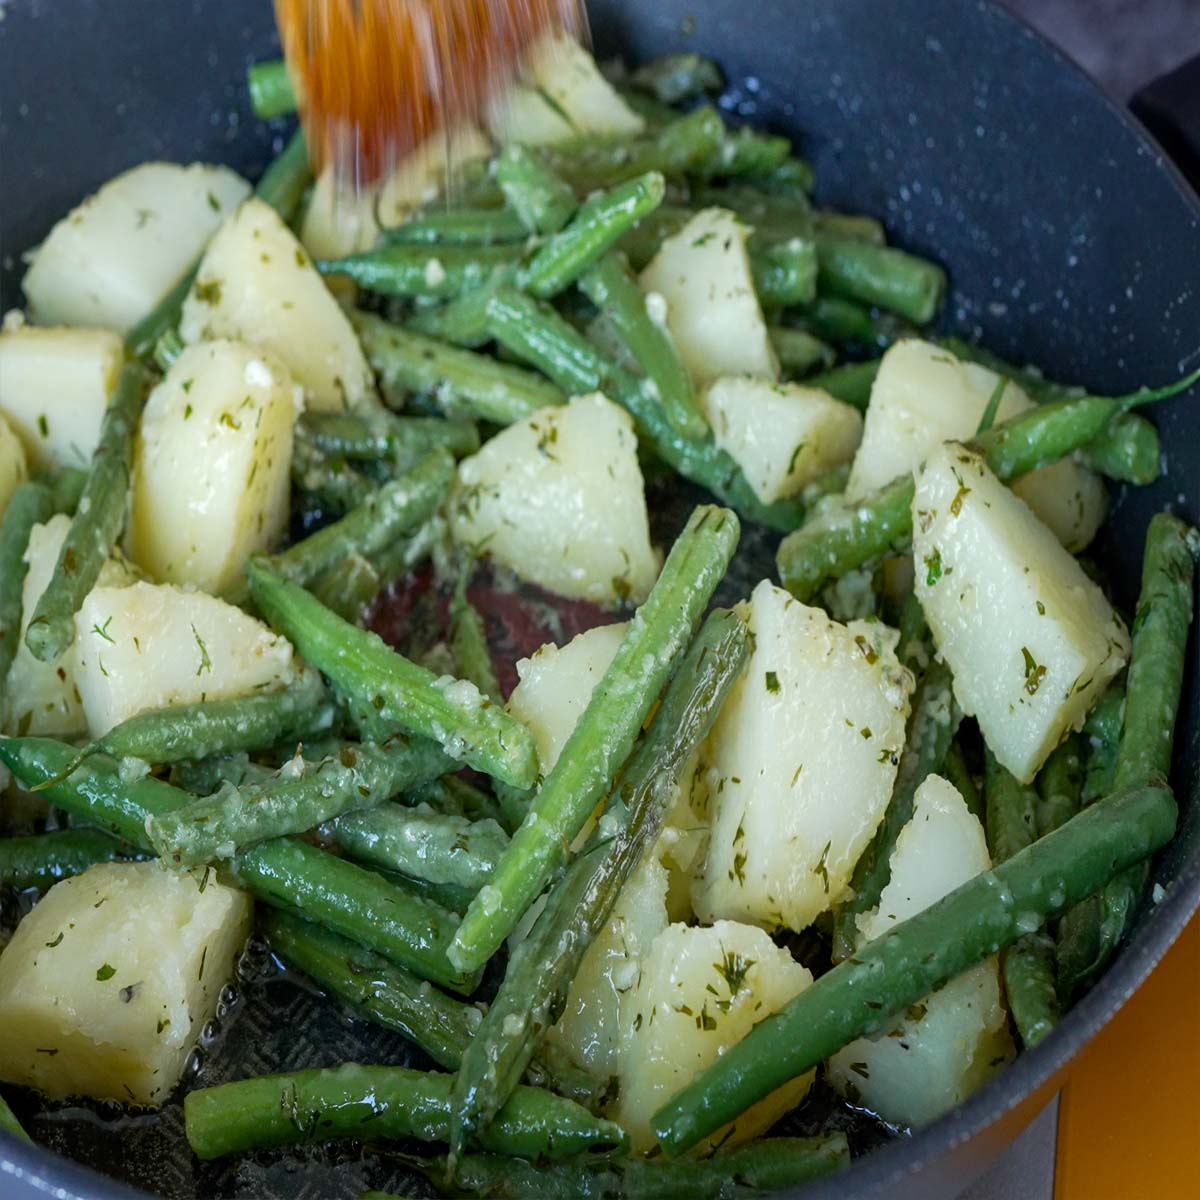
12. Drain potatoes and green beans, transfer to pan on medium heat, season, add flavored butter, and cook for 5 minutes.

13. Serve hot Chicken Kiev with boiled potatoes and green beans as a side dish.
📖Variations
- Spicy Chicken Kiev: Incorporate cayenne pepper or hot sauce into the butter mixture for a spicy kick. You can also add some chili flakes to the breadcrumbs.
- Pesto Chicken Kiev: Mix pesto sauce into the butter mixture for an herby and nutty flavor. It adds a vibrant green color to the dish.
- Cajun-Style Chicken Kiev: Spice things up with Cajun seasoning in the butter mixture and a bit of paprika in the breading.
- Cheese-Stuffed Chicken Kiev: Add a layer of your favorite cheese inside the chicken for a gooey and savory twist. Mozzarella, Brie, or goat cheese work well.
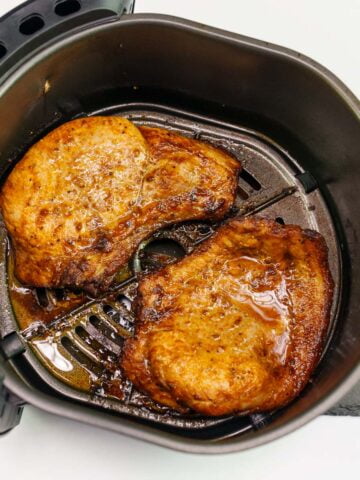
- Air Fryer Chicken Kiev: Instead of deep frying and oven, cook the breaded chicken in an air fryer for a lighter and crispier result.
🔪Equipment
Check out all of my kitchen essentials in my Amazon Store! You can find the equipment I use in this recipe: Knife, Cutting Board, Grater, Large Bowl, Pepper Grinder, Spatula, Meat Tenderizer, Small Bowl, Strainer Spoon, Saucepan, Baking Dish, Fry Pan and Soup Ladle.
🍽 How to Serve
- Family-Style Serving: If serving at a family gathering or dinner party, you can present the Chicken Kiev dish on a platter, allowing guests to help themselves.
- Side Dish Placement: Position the side dish, such as boiled potatoes and green beans, alongside or underneath the Chicken Kiev for a well-balanced plate.
- Accompaniments: Serve with a side of rice, crusty bread, or salad like Pasta Salad, Waldorf Salad or Potato Salad to complement the dish and create a complete meal.
- Pairing Suggestions: Consider serving Chicken Kiev with a light white wine, sparkling water with a slice of lemon, or a refreshing Pink Lemonade drink.
💭Tips for Recipe Success
Quality Ingredients: Use fresh and high-quality chicken breasts, butter, and herbs for the best flavor and texture.
Butter Softening: Ensure that the butter is softened to room temperature before mixing it with herbs. This makes it easier to blend and stuff into the chicken.
Balanced Flavors: Taste the flavored butter mixture before stuffing the chicken. Adjust salt, pepper, and lemon juice to achieve a well-balanced flavor profile.
Consistent Chicken Thickness: Pound the chicken breasts to an even thickness. This ensures even cooking and prevents one part from drying out while another is undercooked.
Chilling Time: Allow the flavored butter to chill sufficiently before stuffing the chicken. This helps it hold its shape during the cooking process.
Dry Chicken Before Breading: Pat the chicken dry before breading. This helps the flour adhere better and ensures a crispier coating.
Even Breading: Coat the chicken evenly with flour, egg, and breadcrumbs. Press the breadcrumbs onto the chicken to create a secure and uniform coating.
Chill Before Cooking: Refrigerate the breaded chicken for at least 30 minutes before cooking. This helps the breading adhere and prevents it from falling off during cooking.
Pan-Fry Before Baking: Pan-fry the Chicken Kiev in a hot oil before baking. This helps create a golden-brown crust and seals in the juices.
Oven Baking: Finish cooking the Chicken Kiev in the oven to ensure it's cooked through without overcooking the exterior. This allows for a moist and tender interior.
Rest Before Cutting: Allow the cooked Chicken Kiev to rest for a few minutes before cutting. This helps retain the juices and keeps the chicken moist.
Storage: If you have leftover Chicken Kiev, store it in an airtight container in the refrigerator. Consume refrigerated leftovers within 2-3 days for the best quality.
❓FAQ
Chicken Kiev is a dish consisting of a breaded and fried chicken breast stuffed with seasoned butter or garlic sauce.
Chicken Kiev is a dish with disputed origins, claimed by both Russian and Ukrainian culinary traditions, and it is often associated with the city of Kyiv (Kiev) in Ukraine.
To cook Chicken Kiev without leaking, ensure a secure seal when stuffing, chill adequately, press breadcrumbs firmly, pan-fry to seal edges, and finish cooking in the oven, allowing for gentle handling throughout the process.
Chicken Kiev can be a healthy dish when prepared with lean chicken breast, whole ingredients, and mindful cooking methods, but moderation and attention to portion sizes are essential for overall nutritional balance.
🍛More Comfort Food Recipes!
Here are more of my favorite comfort food recipes! Try these:


If you make this Chicken Kiev recipe or any other recipe on my website, please leave a star rating at the bottom of this page! This provides helpful feedback to both me and other readers. Also, let me know how you go in the comments below. I love hearing from you!
I love to cook, bake and share my recipes with all of you! If you want more delicious recipes you can subscribe to my newsletter and follow along on YouTube, Instagram, TikTok, Facebook and Pinterest!
🎥Watch my Videos
This video will show you the details and step-by-step instructions for making these fantastic Chicken Croquettes!
📖 Recipe

Chicken Kiev
Ingredients
For Butter:
- 4 tablespoon Dill
- 120 g Butter
- 4 tablespoon Parsley
- 1 Lemon Zest
- 2 teaspoon Lemon Juice
- 1 teaspoon Salt
- ½ teaspoon Black Pepper
- 3 Garlic Cloves
For Chicken:
- 500 g Chicken Breast
- ½ teaspoon Salt
- ¼ teaspoon Black Pepper
For breading:
- 75 g Flour
- 3 Eggs
- 120 g Breadcrumbs
For Side Dish:
- 2 Potatoes
- 100 g Green Beans
- ½ teaspoon Salt
- ¼ teaspoon Black Pepper
Instructions
- Place the softened butter, chopped dill, chopped parsley, lemon zest from one lemon, lemon juice, salt and freshly ground black pepper, minced garlic cloves into a bowl and mix well.
- Lay out a piece of plastic wrap, place the butter mixture in the center, and shape it into a log. Wrap it tightly in the plastic wrap and place it in the freezer for 15 minutes until firm.
- Cut each chicken breast by placing it on a chopping board and using a sharp knife to slice it into a thinner fillet.
- Place each chicken breast fillet between two sheets of cling film and bash with a meat tenderizer until flattened.
- Season the chicken breast fillet with salt and black pepper.
- Cut the frozen butter into pieces. Put one on each chicken breast and wrap the flesh around the butter to fully enclose it.
- Put the chicken in the freezer for 15 minutes.
- Dredge each stuffed chicken breast in the flour, dip into the beaten eggs, and coat with breadcrumbs, ensuring an even coating and shaking off any excess.
- Heat oil in a pan over medium heat. Fry the breaded chicken until lightly golden brown on all sides.
- Transfer the partially cooked chicken to the preheated oven at 180°C (356°F) and bake for about 20 minutes or until golden-brown and completely cooked through.
- While baking the chicken, boil potato chunks and green beans.
- Remove the potatoes and green beans for the boiling water, place in a pan on medium heat, season with salt and black pepper, add a piece of flavored butter and cook for 5 minutes until well combined.
- Serve the Chicken Kiev hot with a side dish of boiling potato and green bean.
Notes
- Ensure that the butter is softened, but not melted, to easily mix in the herbs and spices.
- Use fresh herbs and garlic for a vibrant and aromatic butter mixture.
- Pat the chicken dry before breading to help the flour, egg, and breadcrumbs adhere better.
- Press the breadcrumbs firmly onto the chicken for a crispy and even coating.
- Refrigerate the stuffed chicken before cooking to firm up the butter mixture.
- Chilled chicken also helps prevent the butter from leaking out during cooking.
Nutrition
Nutritional information is based on third-party calculations and should be considered an estimate only. Actual nutritional content will vary based upon brands used, measuring methods, cooking method, portion sizes, and more.


Sandra
This dish is pure comfort food. The garlicky butter just explodes with flavor when you cut in, and the chicken stays so moist.